Tutorial by Ted Bergeron
Scaling an image in GIMP is not easy like Photoshop. There are no handles to grab onto to transform and scale. So here we go.
Starting files
You’ll need a background image and a character image.
-
A large cityscape image.
-
A character image. I’ll use a potato on a white background so I can easily remove the white and make it transparent.
Open GIMP and create a new file
-
7" wide x 10.5" high
-
Create a layer to paste your background into
Add city background
-
Open your city background image
-
Select all and copy (Ctrl-A, Ctrl-C)
-
-
your working image.
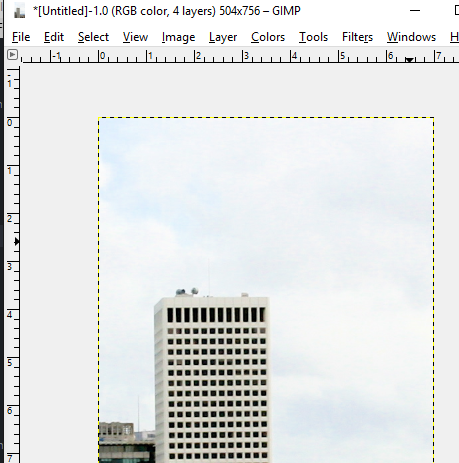
That is a large image so let’s make it fit side-to-side.
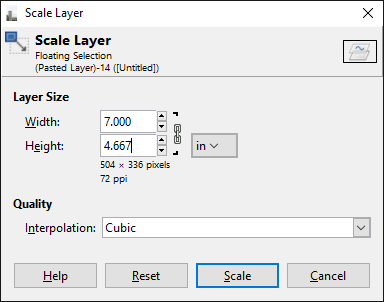
Scale the layer
-
-
In the width set to the width of the image, which is 7".
-
Tab into the height box.
-
Click the Scale button.
-
Add the character layer
Next we will add the giant potato character.
-
-
Select the potato character image and click Open.
-
| This is a faster method than opening a file and copy/pasting onto a layer. |
Make background transparent
-
-
Use Fuzzy Select Tool
-
Click in the white background
-
Delete
-
Resize the character to fit the scene
-
Use again
-
This time you are going to guess. I tried 4" wide to start.
-
Still too big, so I used Scale Layer again and changed it to 3" wide. Looks good.
-
Move your character into place using the arrow keys or mouse.
Duplicate cityscape to complete the image.
-
Select the cityscape layer, I’ve labeled Background Sky, and Duplicate Layer.
-
Move the new layer, I’ve labeled City with sky removed, to the top.
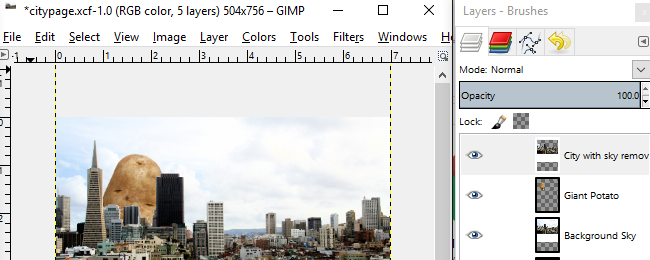
-
Use Fuzzy Select Tool.
-
Click in the sky to select it.
-
Use the Shift key to add to the select as needed to select the sky.
-
-
Click Delete.
Layer sandwich
The illusion is complete. We have a background city on the bottom. A potato character on a transparent layer sandwiched in the middle. Finally the city layer duplicated on the top with a transparent sky so that the potato and background sky can show through.
You can use this same technique with your own hand drawn sketches.
Credits
San Francisco cityscape by Richard Giles